Gadzooks! You’ve suddenly realized that it is almost Halloween and you haven’t even thought about decorating your house yet. If that’s the case, you’re probably one of the 22% of shoppers that leave their shopping to the last two weeks before the harrowing holiday. Whilst it’s easy enough to pop out to a Halloween store and just buy some decorations, doing so can be expensive as prices of popular items can sometimes be inflated, if there are any left at all, and lines will be long! So, what about making your own DIY Halloween decorations of your own?
Top Rated Shopping List App
Share And Synchronize An Unlimited Number
Of Lists With Others Instantly and Easy
Cheap DIY Halloween Spider Decorations:
Many DIY Halloween decorations can be off-putting as they can be time consuming or complicated. Subsequently, they might not look as good as you’re expecting or take a lot longer than the time you have. But never fear, because we have a list of quick and easy Halloween decoration ideas for those who are pressed for time or not as confident in their crafting skills as others.
Quick Last Minute Halloween Decorations Shopping Tips

Don’ts
Don’t rush! It might seem counterintuitive in an article about last minute DIY Halloween decorations, but it’s good advice. These decorations are already designed to not take up too much of your time. Rushing could mean they might go wrong or might come out looking a bit shabby. Worse, you might end up injuring yourself.
Do’s
Do take a good look around your home to see what materials for these crafts you already have. You’ll be surprised what things you might have hidden away and forgotten about from previous bouts of crafting. If you have less things to buy, you’ll spend less time in the shops, meaning more time for you to make your decorations.
Do use a shopping list when going out to buy materials for these scary Halloween decorations. Using a shopping list means you’re less likely to miss items off your list. If you’re short on time, the last thing you want to do is have to go back out to the shops to get items you’ve forgotten. What’s more, shopping list apps like Listonic, have a sharing function, which means you can have friends and family help out with getting materials for your crafts, saving you even more time.
Download the Highest Rated Shopping List App
- Always with you on any device
- Buy exactly what you planned
- Make and share shopping lists together
- See items automatically grouped into categories
Do see if you have any decorations from previous holidays that you can adjust to make DIY Halloween ones.
Do have family and friends help you. A problem shared is a problem halved, and Halloween decorations made with friends and family will take less time. Plus, it’s a great way to socialize and get into the Halloween spirit.
Super Quick Last Minute DIY Halloween Decorations
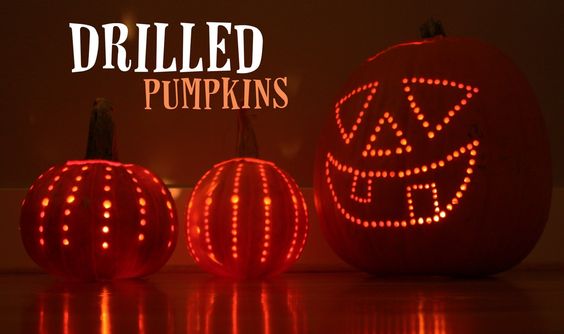
#1 Drill a Pumpkin
You want your Jack-o’-lanterns looking like all the amazing ones you see on web pages or on social media. But sometimes yours come out in a worse state than a slasher movie victim.
Carving pumpkins is time consuming and difficult. Rushing one because your Halloween party is closer than you think is only going to make it look horrific (and not in a good way)!
- Take a pumpkin
- Remove the pulp and seeds
- Use a power drill to create a pattern of holes in the side of your pumpkin
By creating Jack-o’-lanterns this way you can end up with intricate patterns that will look impressive when a candle is placed inside. It might not but be traditional, but it can potentially be a quick and impressive centerpieces to your decorations.
? TIP
Use different sizes of drill bits to create a variety of holes in your pumpkin for extra detailing.
Drill a Pumpkin Shopping List
- Pumpkin (from $3.50)
- Power drill (from $17)
Total: $20.50
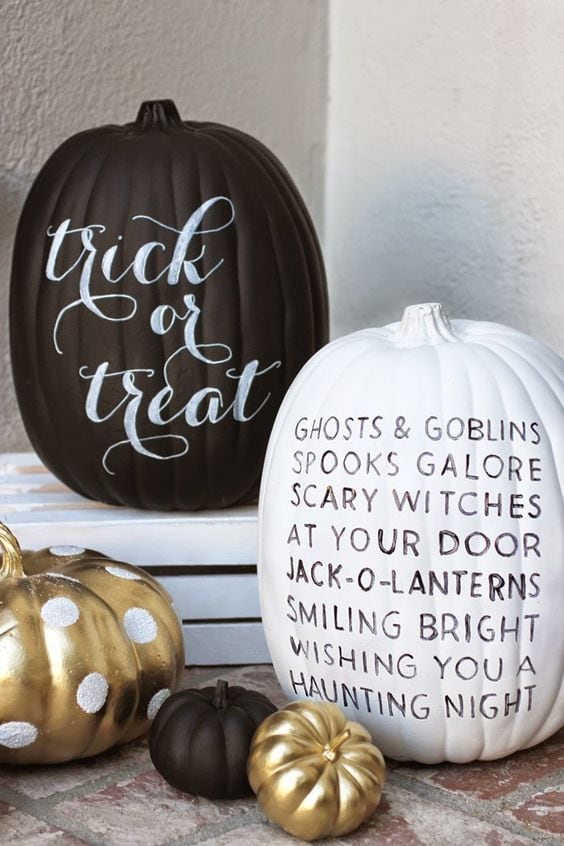
#2 Paint or Decorate a Pumpkin
If taking a power tool to your pumpkin seems a little extreme, then you can try painting or decorating one instead. Furthermore, this method will save even more time as you won’t have to scoop out the pulp and seeds from your pumpkin, which can be time-consuming and messy.
- Take a pumpkin
- Decorate it using paint or crafting material
You can paint a traditional Halloween grimace, decorate it with paper cut outs of other Halloween imagery, wrap it in ribbons, shower it with glitter…anything, really!
Whilst you won’t be able to make it shine at night by putting any lights inside, you will have the added bonus of not having to clean up rotting pumpkins from your front lawn or living room the next day.
Paint or Decorate a Pumpkin Shopping List
- Pumpkin (from $3.50)
- Paint or crafting materials (from $5)
Total: $8.50
#3 Spooky Soap
Give your guests a spooky surprise in the bathroom by inserting some heebie-jeebies into their personal hygiene routine.
- Use a clear soap dispenser bottle
- Put small plastic decorations inside it
- Fill the bottle with liquid soap
You can also glue some of the plastic decorations to the side of the bottle for extra creepiness.
? TIP
All the plastic objects may sink to the bottom over time, depending on the viscosity of the liquid soap. So periodically, give the soap dispenser bottle a shake or a stir to redistribute the plastic decorations around the bottle.
Spooky Soap Shopping List
- Clear soap dispenser bottle (from $6)
- Small plastic Halloween decorations (from $6)
- Liquid soap (from $4)
Total: $16
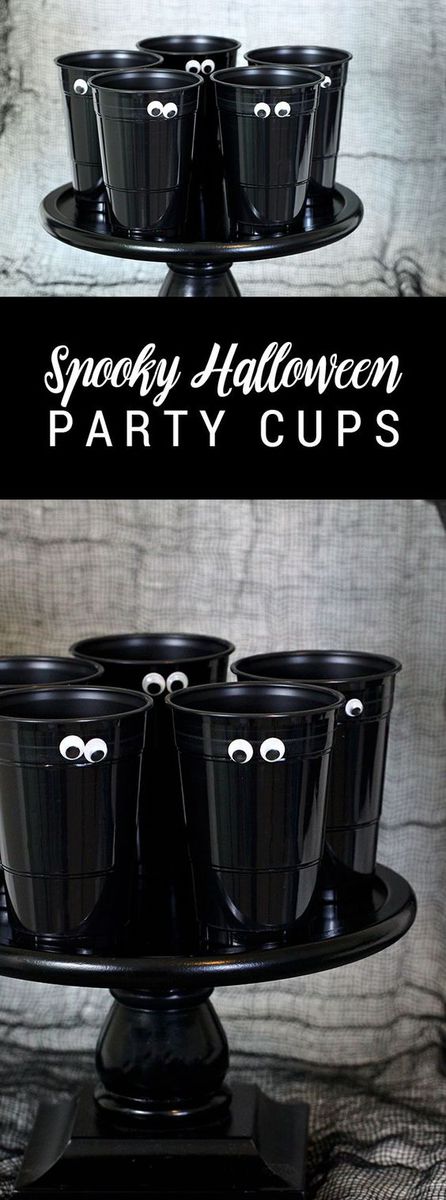
#4 Creepy Party Cups
Your guests are going to get thirsty, so you’ll definitely have already planned to buy some plastic cups. Apart from using these as beverage receptacles, you can also make these into general decorations by attaching some string to them so they can hang from a plant or from the ceiling.
-
- Take a plastic cup
- Decorate it using marker pens, pieces of paper, googly eyes, or other crafting materials
You can do pretty much anything with these cups, and can decorate them according to their color. Got green party cups? Make them into Frankenstein’s monster. Awash with white party cups? Make them into a gaggle of ghosts. A batch of black ones? Transform them into vampire bats.
![]()
Creepy Party Cups Shopping List
- Black plastic cups (from $4)
- Crafts for decorating (from $6)
Total: ($10)
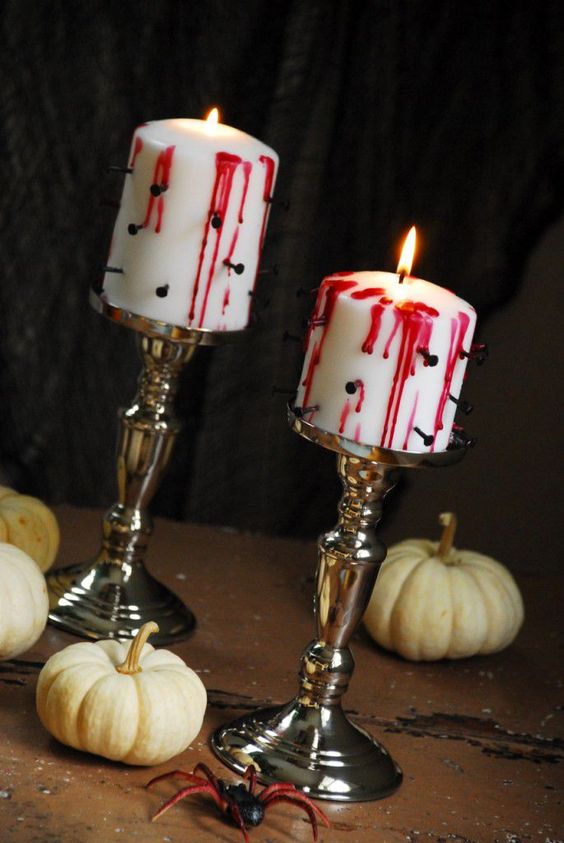
#5 Bloody Candles
Nothing says Halloween like a bit of light gore. Candles are also heavily associated with Halloween for their eerie flickering light. So, why not combine the two.
- Find some white candles, and place them upright
- Take some red candles and light them
- Drip the wax from the lit red candle over the tips of white candles and let the red wax trickle down them
To be extra gruesome, you can even even push some black tacks into the side of the candle. Be careful if you’re doing this though, you don’t want the candles to be literally bloody!
Bloody Candles Shopping List
- White candles (from $6)
- Red candle (from $1)
Total: $7
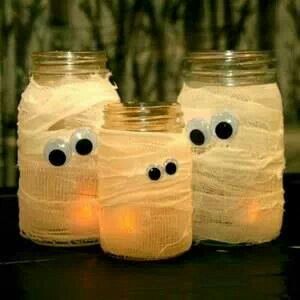
#6 Mummy Candles
If bloody candles are a bit too macabre for you, then why not host a party like a dead ancient Egyptian with these mummy candles?
- Use some candles that come in glass jars
- Wrap the jars in self-adhesive medical bandage
To make the candles more spooky, you can use strips of stained and frayed cloth and stick it to the glass jars using a hot glue gun. If you prefer something more lighter in tone, you can stick some googly eyes to them.
Just made sure any material used does not go any higher than the rim of the jar, as this could cause the heat and flame of the candle to set the fabric alight.
Mummy Candles Shopping List
- Candles in glass jars (from $10)
- Self-adhesive medical bandage (from $5)
Total: $15
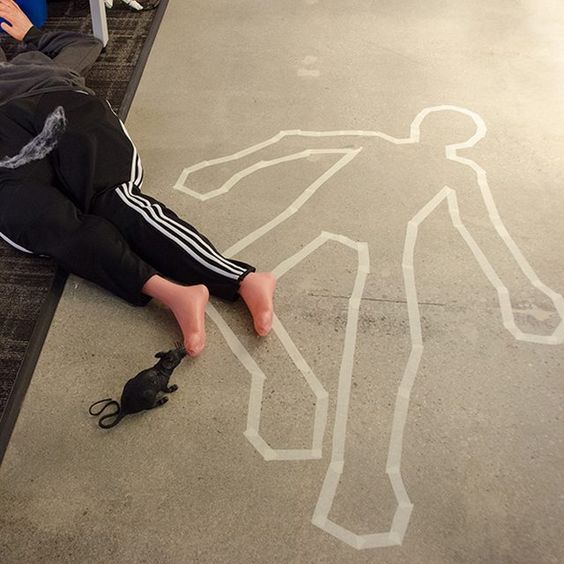
#7 Crime Scene Outline
Turn your home into a crime scene this Halloween by recreating an outline of a murder victim.
- Use some masking or duct tape to draw the outline of a person on the floor
If you’re worried you won’t be able to make a convincing figure on your floor by yourself, you can get someone to model for you. Simply ask them to lie on the floor in the desired position, and then trace their outline using the tape.
Crime Scene Outline Shopping List
- Masking or duct tape (from $3)
Total: $3
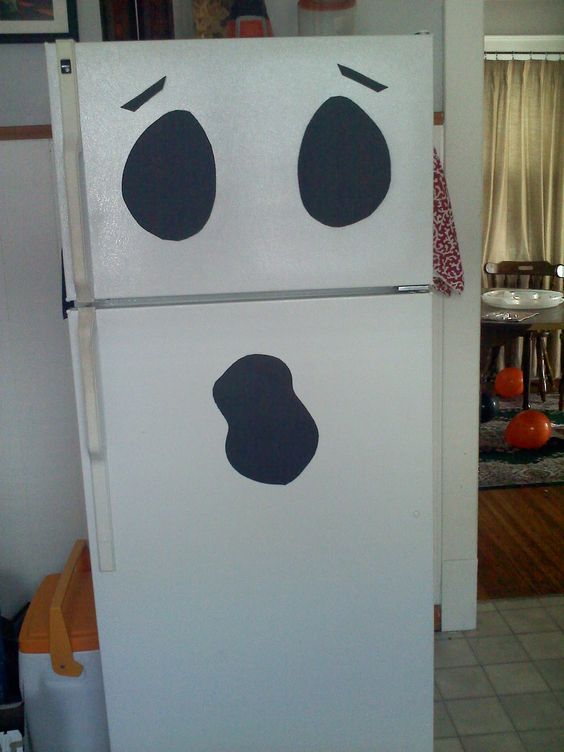
#8 Frightful Fridge
Turn your fridge into a wailing specter this Halloween in less time than it takes to resurrect the dead.
- Use large pieces of black card
- Draw the outline of some eyes and a wailing mouth
- Cut out and stick these to your fridge using double-sided adhesive tape
This works best if your fridge is white. But if it isn’t, you can use different colors of card to create different features to stick to your fridge instead. You can even create different monsters.
Frightful Fridge Shopping List
- Black card (from $3.50)
- Double-sided adhesive tape (from $3.50)
Total: $7
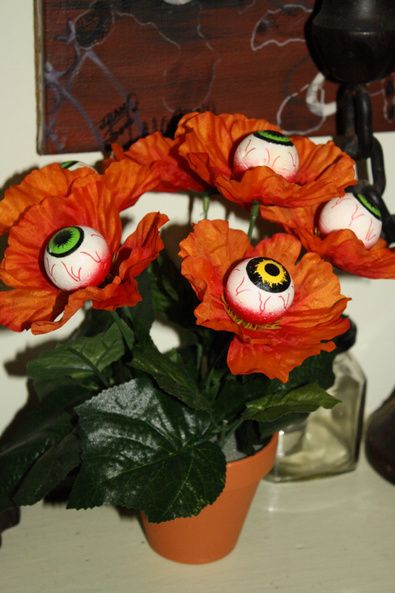
#9 Spy Flowers
Ever feel like someone’s watching you? Because your flowers will be once you’ve made these frightening flora.
- Buy some fake flowers. Ones with long stems, large centers, and dark colored petals work best
- Get some fake eyeballs
- Glue the eyeballs to the centre of the flower using a hot glue gun
- Arrange the flowers in a vase
Instead of buying fake eyeballs, you can make eyes out of some table tennis/ping pong balls using some fine marker pens.
Spy Flowers Shopping List
- Fake flowers (from $10)
- Fake eyeballs (from $4)
- Hot glue gun (from $3.50)
Total: $17.50
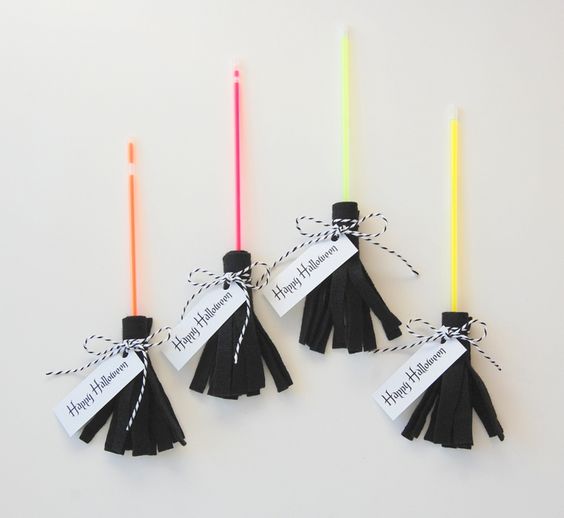
#10 Glow Stick Brooms
Add some color and light to you decorations by turning glow sticks into witches’ brooms.
- Glue strips of colored paper to one end of a glow stick
- Activate the glow stick
If you’re making these in advance, remember to activate the glow stick on the night of your party or celebrations. However, if you activate them before the stick will lose its glow before the frightful festivities have even begun!
? TIP
Whilst thin glow sticks work well, what works better are the thicker ones. This is because these tend to have a loop at one end to attach string to. Therefore, you can hang these from your ceiling instead of sticking them to your walls.
Glow Stick Brooms Shopping List
- Glow sticks (from $7)
- Colored paper (from $3.50)
Total: $10.50

Frightfully Fast Fun
Now you’re armed with 10 quick and easy DIY Halloween decorations for your Halloween bash.
Which ones do you think will be the quickest and easiest? Have you made any of these before? Do you have any other ideas for super quick last minute DIY Halloween decorations? Let us know in the comments.
For more inspiration, check out our other articles in our Halloween section.
Shopping Guides
How to Shop for Halloween if You Hate Halloween
Shopping List Ideas
13 Cheap and Simple Halloween Ghost Decorations
13 Cheap DIY Halloween Costumes for Less Than $50/£40
13 Cheap DIY Halloween Spider Decorations
DIY Halloween Kids Decorations
Gruesome DIY Halloween Yard Decorations
[…] 10 Quick Last Minute DIY Halloween Decorations […]
[…] 10 Quick Last Minute DIY Halloween Decorations […]
[…] 10 Quick Last Minute DIY Halloween Decorations […]
[…] 10 Quick Last Minute DIY Halloween Decorations […]